Intro to 3D Printing, Part 4
All of this reading and we've finally made it to the end of the process! The previous post touched on things to know before and during the print, so we'll wrap up the series with a bit of knowledge on things you should know about the end of the process.
In this post, we'll talk about:
- The end of a 3D print
- Failed prints
- Cleaning up
- Finishing Touches
- Printer Maintenance
What Happens When a Print Finishes?
One of the best parts of owning a 3D printer is the anticipation and excitement of seeing the completed part that it just created. A machine in my home that can take a few meters of plastic line and turn it into something amazing -- what's not to like? Every 3D printer has a different way of announcing that it's done with a job, but generally the important part is that the machine will move the hot end out of the way so you can access the part that just finished printing. This next part is so important it's going in its own little bubble:
Warning
You won't be able to remove a printed object from the build surface of the printer immediately when it's done -- you must wait for it to cool down. The part will get progressively easier to remove as the machine cools down; the sooner you try to remove it, the more you risk damaging your part and printer through brute force.
Sometimes a part will pop off the build plate after it cools down and you can pick it right up... but sometimes it will require some gentle (but firm) force. You'll want to use the print removal tool -- or, very carefully, a utility knife blade -- to get under the part so that it can lift off the build plate.
Warning
You'll want to make sure to be extra careful if you're using anything sharp; one wrong move and you'll damage the build plate, the part you just printed, or yourself. Sometimes removing a part can take a few minutes, so don't be discouraged. Take your time and go slow.
This is also a great reason to look into a 3D printer that has a removable, flexible build plate: it makes removing prints much easier at the cost of a slightly more expensive setup.
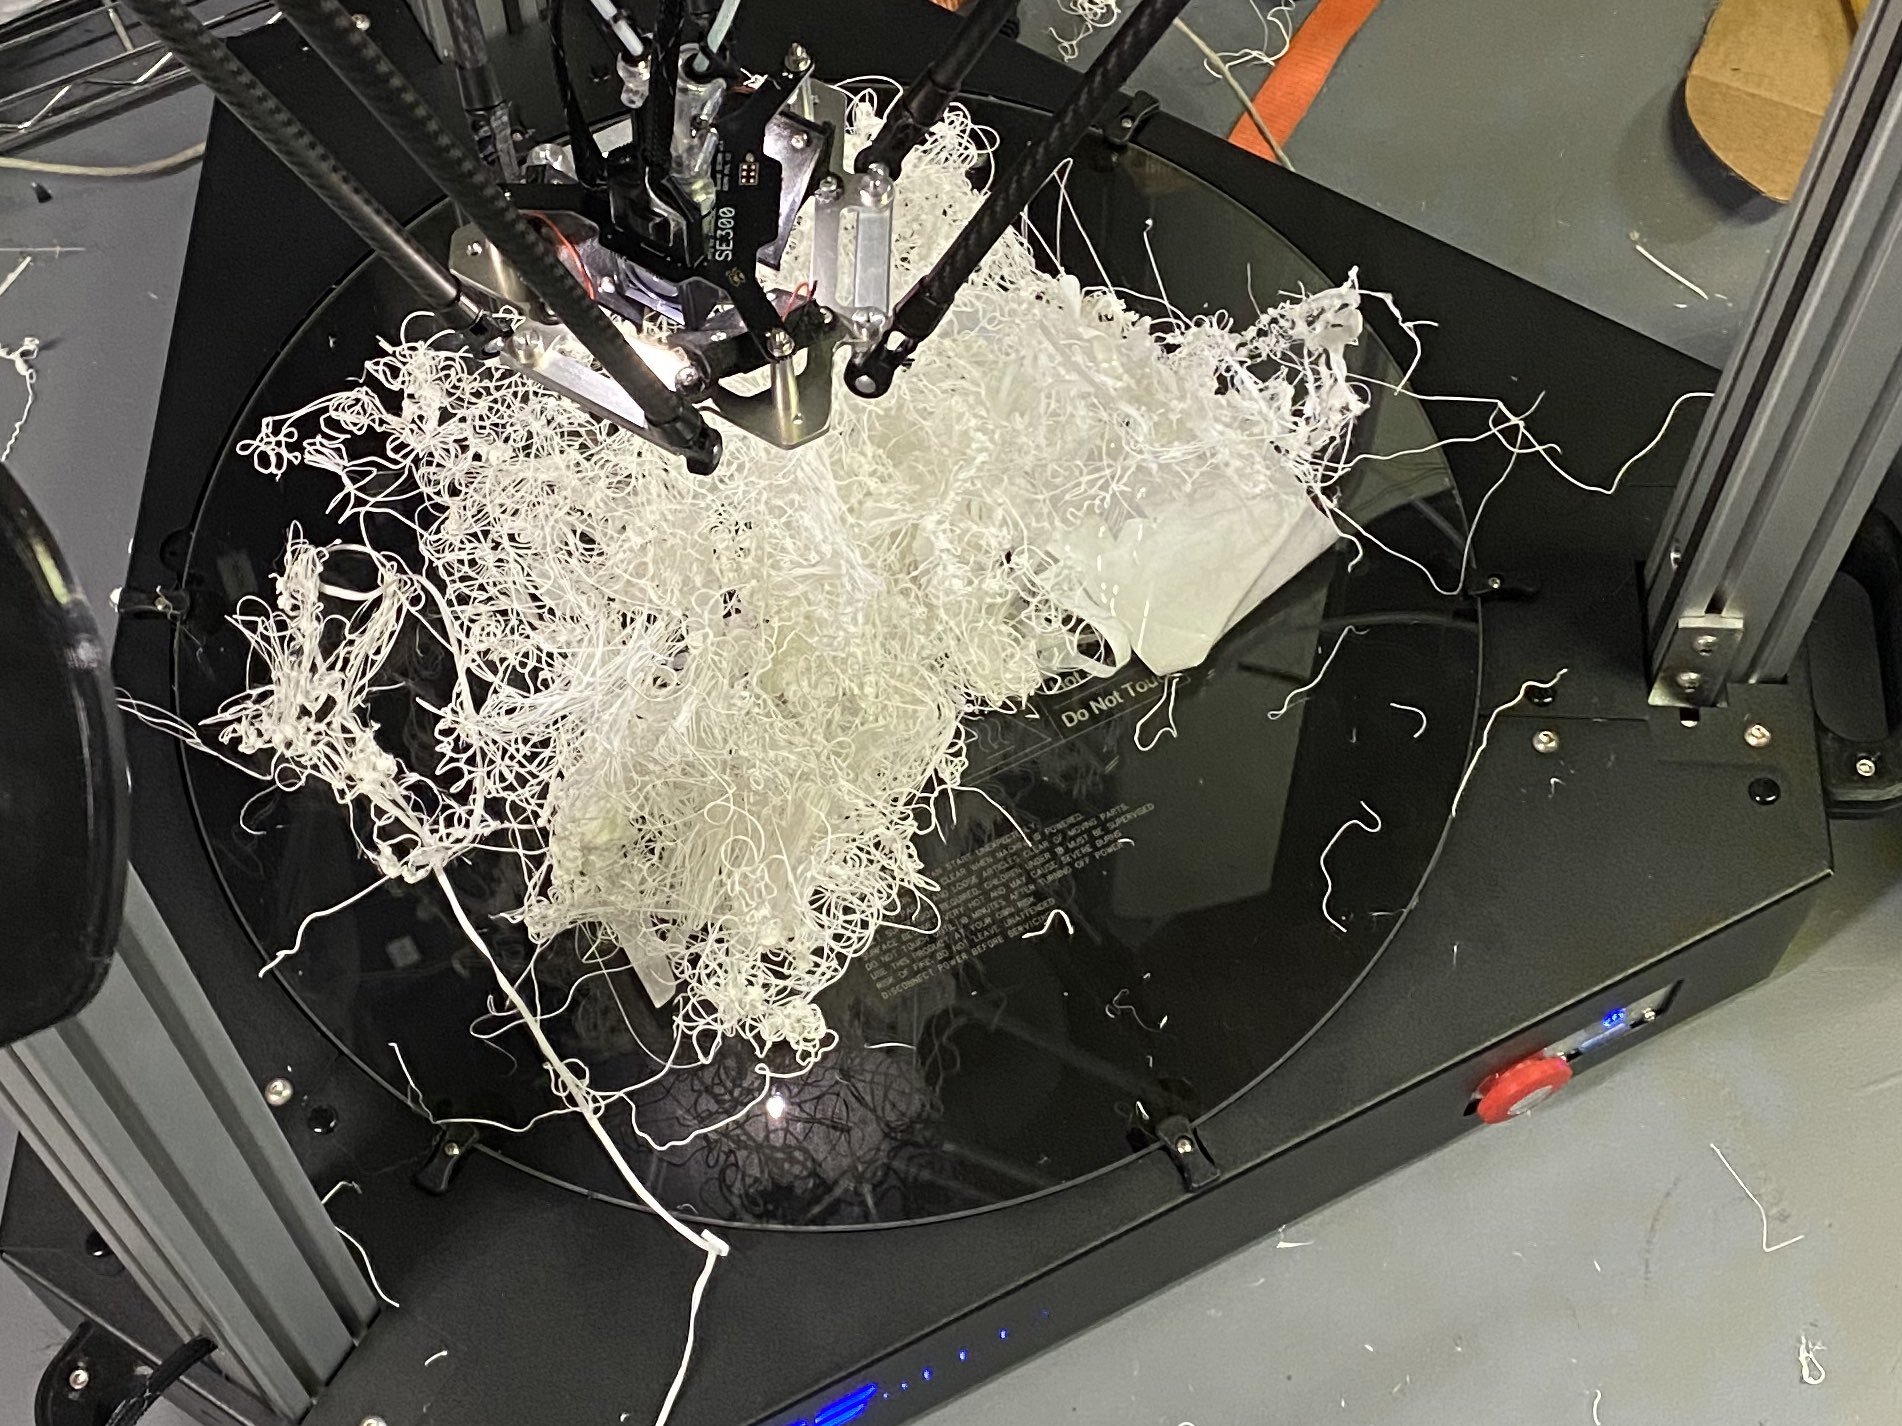
Sometimes Prints Fail... and That's Okay
Running a 3D printer is an inexact science. Sometimes parts don't stick to the build plate; sometimes the nozzle will jam; sometimes things won't move the way that they should. It's not just you -- it's something that literally everyone deals with in this hobby. Sometimes it will take several tries before you get a result that you're happy with, and that may require tweaking the physical printer or the settings in your slicer program.
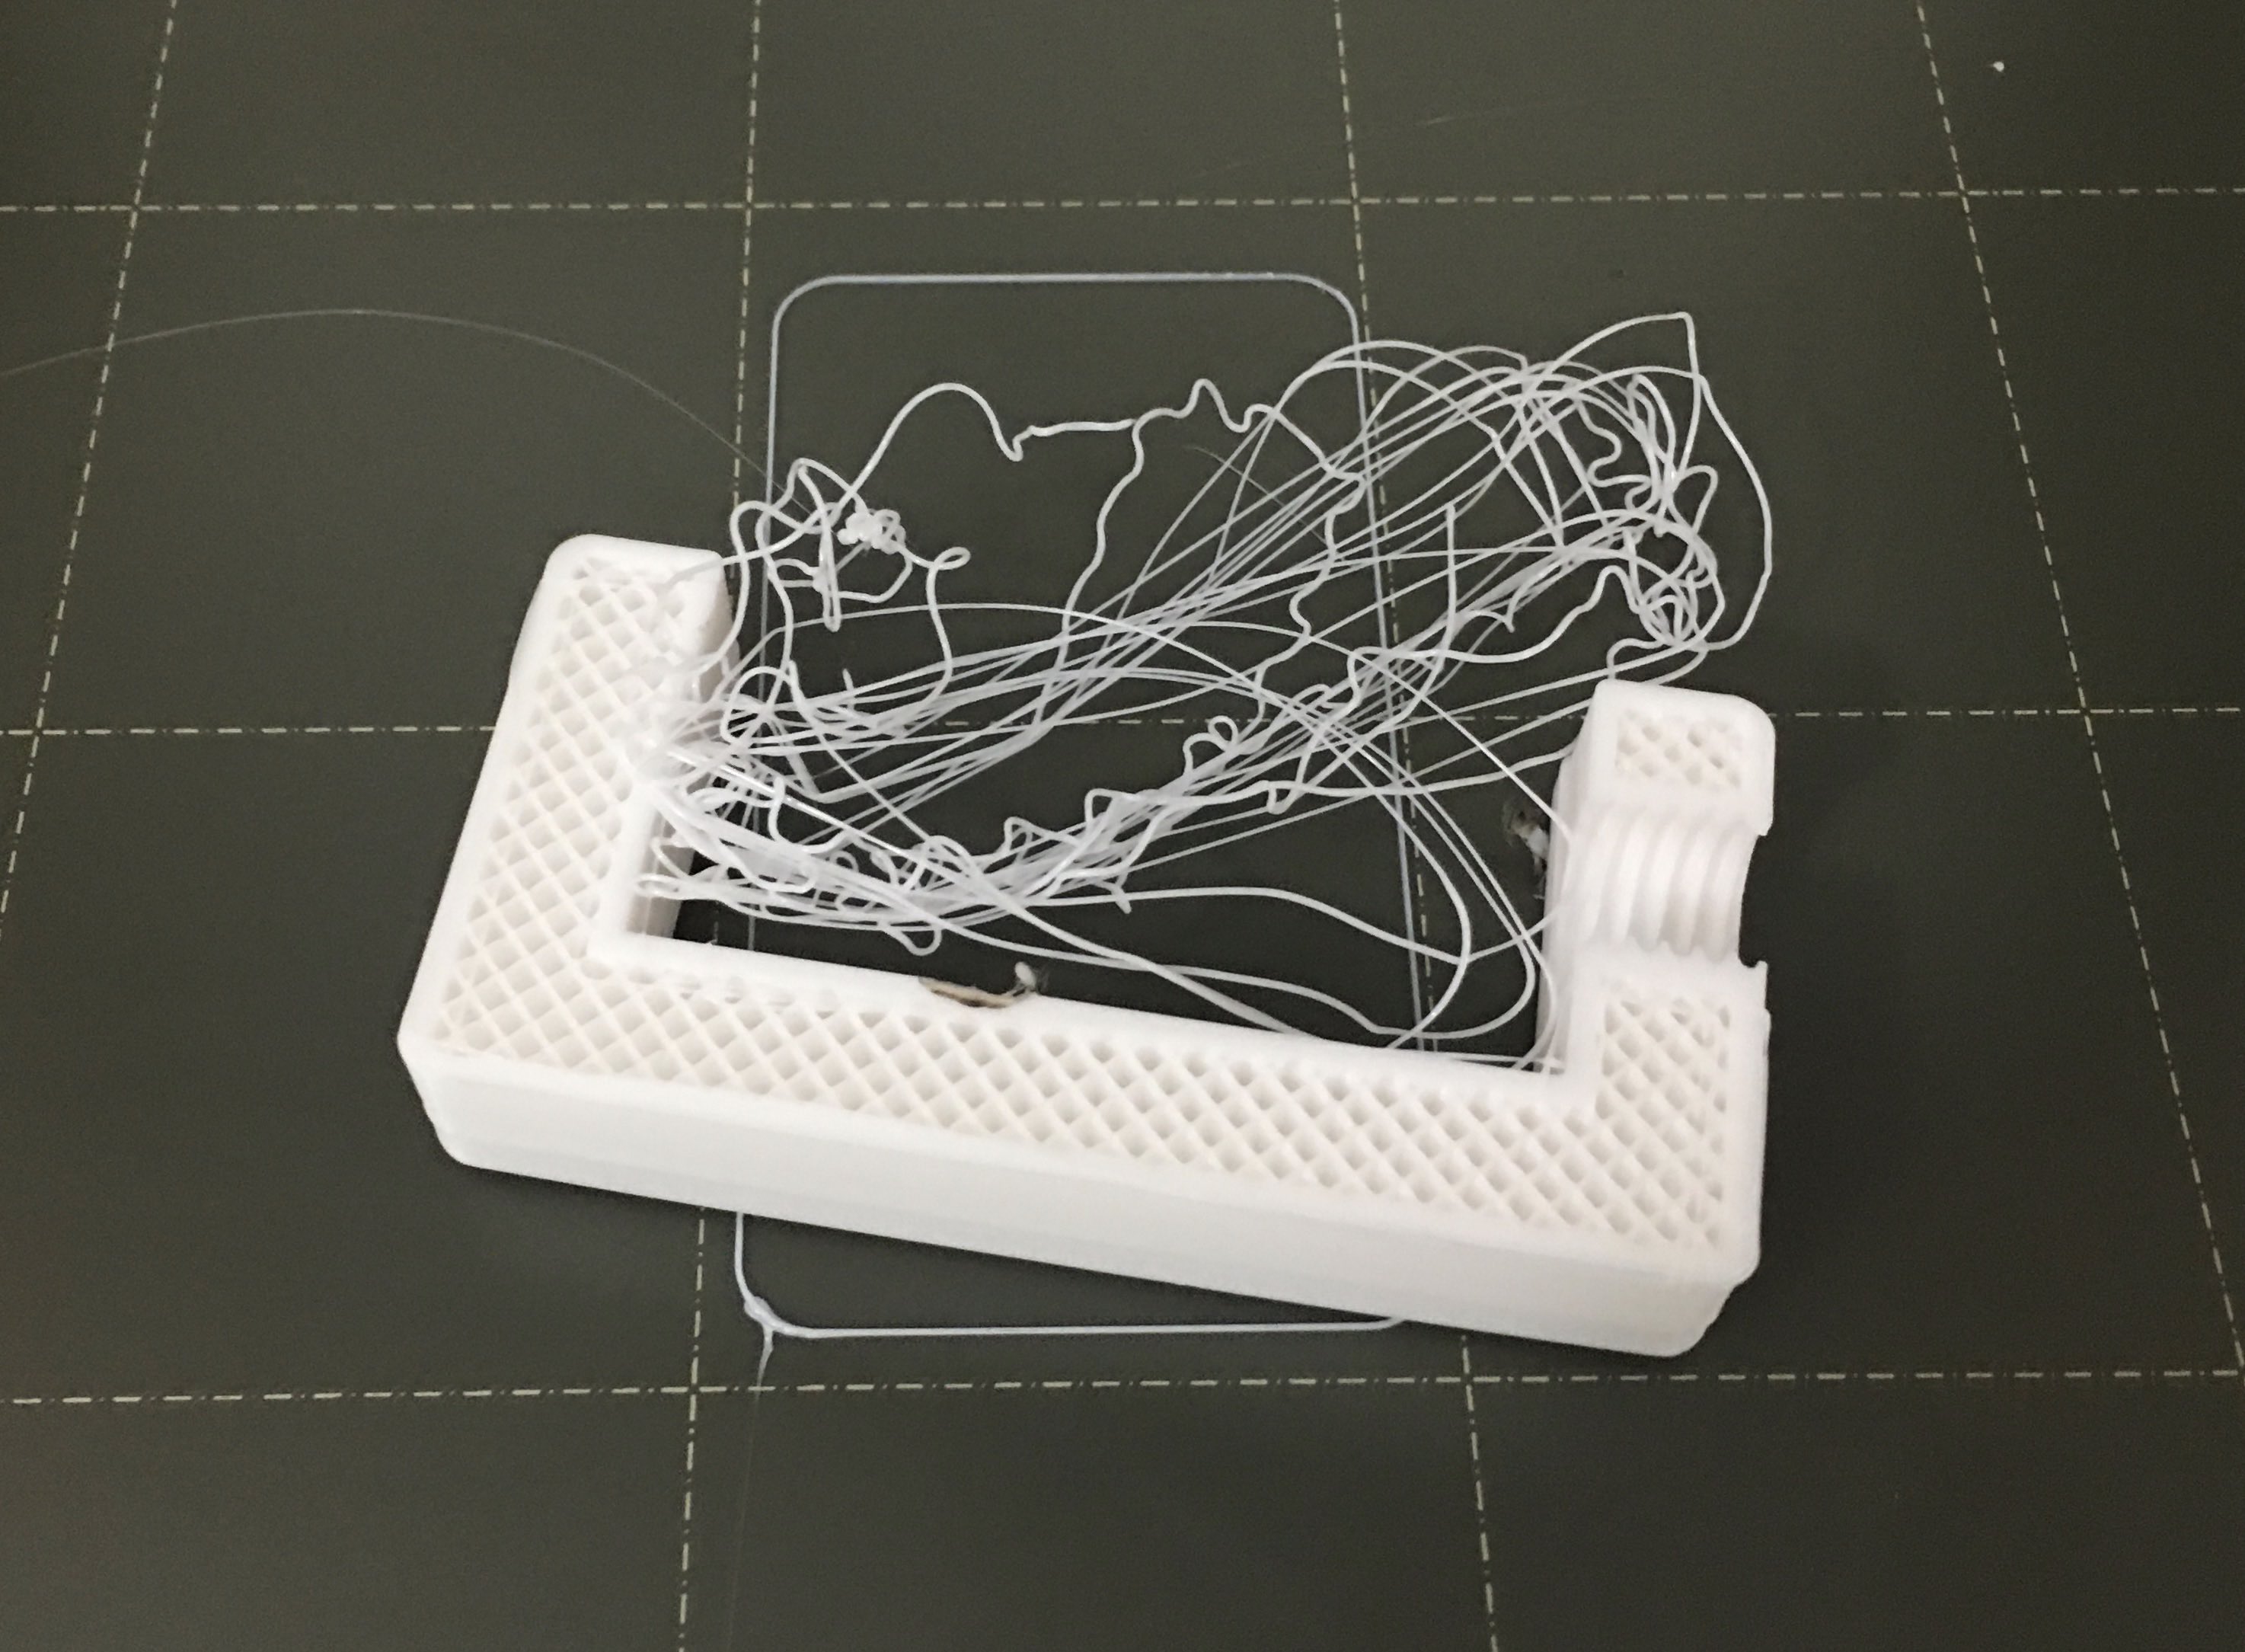
The best way to approach this when it happens is to clean up the plastic spaghetti and try again. It's important to watch at least the first layer get printed, as most failures will happen at this time. There are many, many different things that could be wrong (nozzle too close to the bed, nozzle too far away from the bed, wrong temperatures, oil on the build surface, etc.) It's also a great idea to check on things occasionally just to make sure that it's still trundling along.
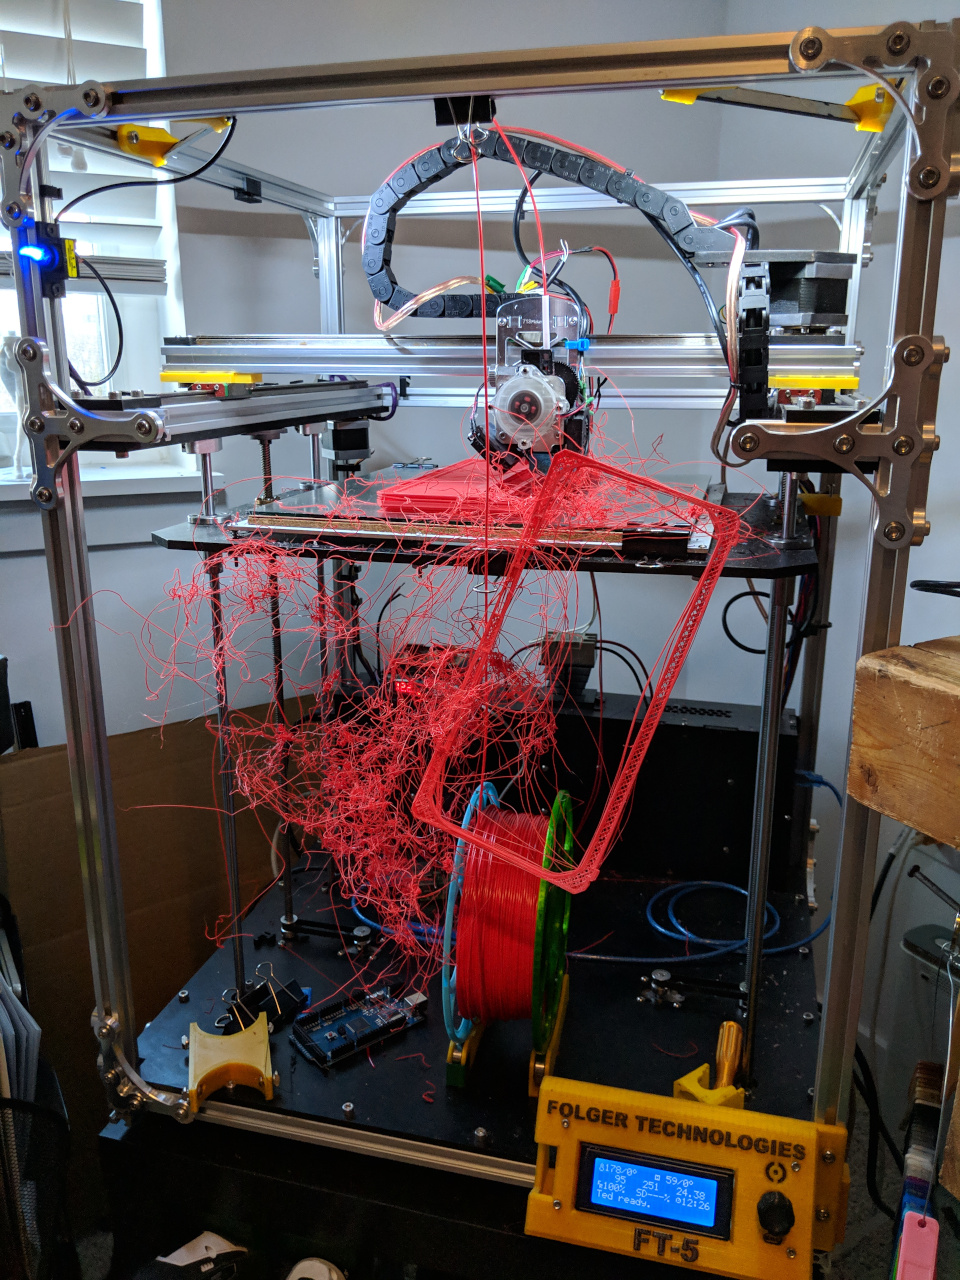
Sometimes failures trend more towards "crap, it's broken" levels -- and that's okay too! That's where the tinkering comes in, because there are very few issues that are not fixable. That's part of the fun!
Cleaning Up Your Workspace
When you run a 3D printer for a little bit, you'll find that there are little bits of plastic left over from the printing process that aren't actually usable or a part of your projects -- this is waste plastic. It's plastic used to make sure that everything is flowing correctly, plastic used to make sure that prints are adhering to the bed, or plastic used to make sure that a color change has worked. There's no use in keeping any of this, so it goes straight into the trash. You'll want to keep a small trash can nearby so that you have somewhere handy to throw these bits -- they accumulate startlingly fast.
There will also be other trash from things like new spools or new parts if you tinker with the machine a lot; all that will also need to find a new home in the trash can.
Cleaning Up Your Prints
Not every 3D print comes off the printer looking amazing -- there may be some extra work that should happen. Small strings can be vaporized with a hairdryer set to "hot" and little blobs can pop off with a little help from a hobby knife.
Info
If you don't already have a hobby knife (commonly sold under the brand names X-Acto and Excel), we recommend one that tightens at the back of the knife instead of at the blade. This type also commonly has a small metal plate that stops it from rolling on the table! Hobby knives are extremely sharp; make sure it stays capped and put away when not in use.
Some more complicated parts will require support material -- extra plastic that will get thrown away but whose only job is to help the overall print succeed -- that will need to be trimmed away. A small pair of micro pliers can help break away material and a set of flush cutters will help tremendously.
Info
Flush cutters are so useful that they tend to disappear to other places. If tools have a habit of misplacing themselves, you may want to get a few of them.
Putting the Finishing Touches on Your 3D Prints
Sometimes you may want to make something that doesn't quite fit on your 3D printer. If that's the case, there may be a few pieces that fit together with screws or glue. Screws are easier because they don't usually scuff up the surface of your work, but they have extra costs in actually buying the hardware... so sometimes that just leaves glue as the next best option. If gluing together parts is something that you're interested in doing, you'll want to put some plastic-specific glues on your wishlist; something like 3D Gloop may be a good place to start.
Warning
Although it may be tempting, be careful when using superglue (sometimes called cyanoacrylate or just "CA" glue) -- it's really good at what it does, but reacts badly with most plastics and leaves white blemishes everywhere it touches. That may not be an issue depending on what you're gluing together, but it's worth noting.
Sometimes prints just don't have enough pizzazz if they're just the color of the plastic, so painting might be the next step. Painting is a huge topic, and the folks at All3DP have a great primer (pun intended) about painting PLA and ABS 3D prints -- check it out here!
Printer Maintenance
3D printers are movement-heavy over a small amount of area, so keeping up with maintenance is important. Most of the time, you'll just need a little oil; if you're in a pinch, 3-In-One Multipurpose Oil will do a great job of keeping things moving smoothly, but for most things on a 3D printer some white lithium grease is the best choice. 3-In-One or other lighter oils will need to be reapplied more frequently, but they also work better at getting into cracks and crevices.
Warning
Don't use anything heavier than white lithium grease; if the grease is too heavy (or if there's too much), it will cause more of a problem than not having it at all.
Danger
Do not use WD-40! They say it can do anything... and what it will do is gum up the bearings in your machine. Stick with the two options outlined above.
Dust and hair stick to grease, so if the machine is in a dusty (or pet-heavy) area, it might need additional cleaning. A little compressed air can help get plastic bits and dust out of hard-to-reach corners! Belts degrade over time (very slowly) so an occasional check to make sure they're still tight is a good idea.
Wrapping Up
Over the last four posts, we've gone over things you need to know from "what is this 3D print thing" all the way to finishing your first print. There's a wealth of good information online about how to fix potential issues, modifications for whatever printer you may want to get, suggestions for various improvements, and more. If you're interested in reading more, Matterhackers has an excellent set of articles about getting started in 3D printing that anyone should read. They definitely aren't required to really dive in, though!
If 3D printing as a hobby is interesting to you and you're not worried about the possibility of getting some grease on your hands, then take a look at some of the machines that are out there. The great thing about the 3D printing community is that it thrives on sharing knowledge and wisdom; if you're curious about something, reach out and ask! There's always someone around with suggestions or ideas for what to try next.
If you have any questions or comments, find me on Twitter: @filamentcolors.